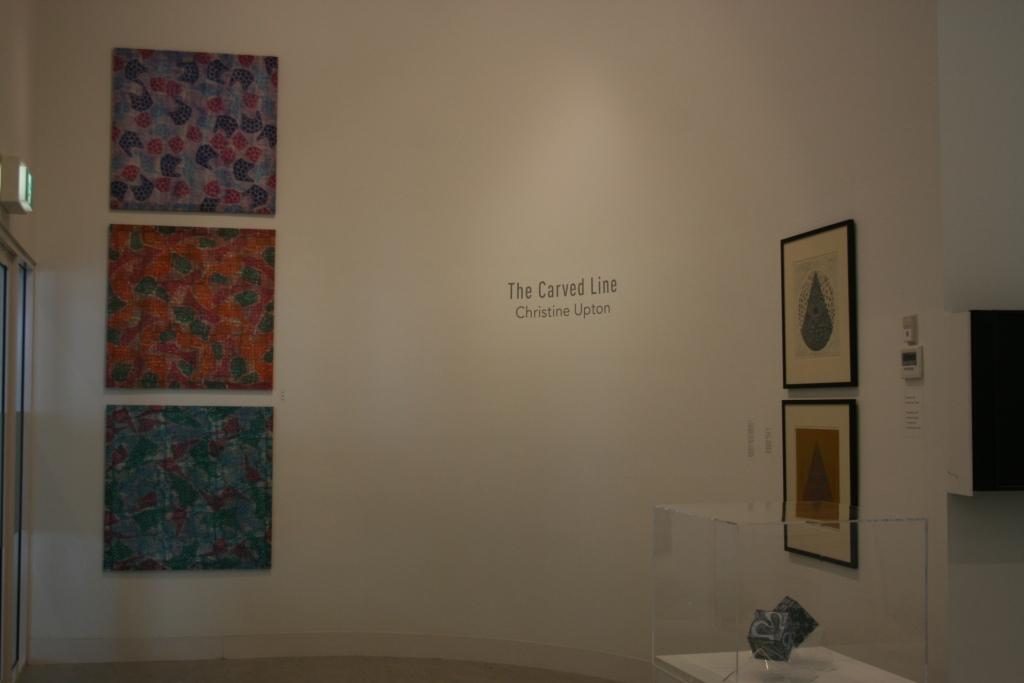
The Carved Line: a retrospective of my work with lino blocks from 1971 - 2014 inclusive
Belconnen Arts Centre (Main Gallery)
2015: March 20 - April 12 (excluding Easter)
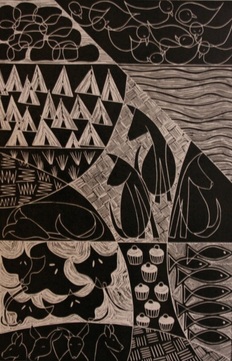
There were 177 framed works; 21 sculptures and 7 pieces on fabric
A massive collection to curate .
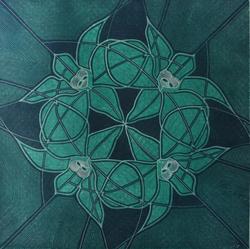
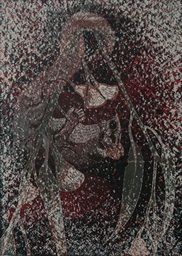
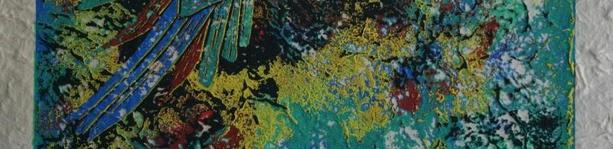
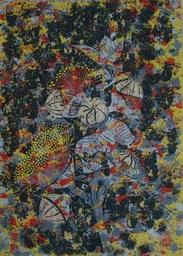
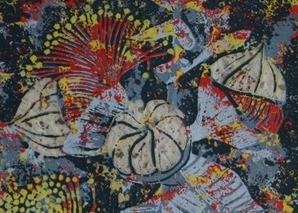
Examples from each series and explanations of techniques used in each series can be seen below
Examples that can be looked at more closely are on the ARTWORK page.
A massive collection to curate .
Examples from each series and explanations of techniques used in each series can be seen below
Examples that can be looked at more closely are on the ARTWORK page.
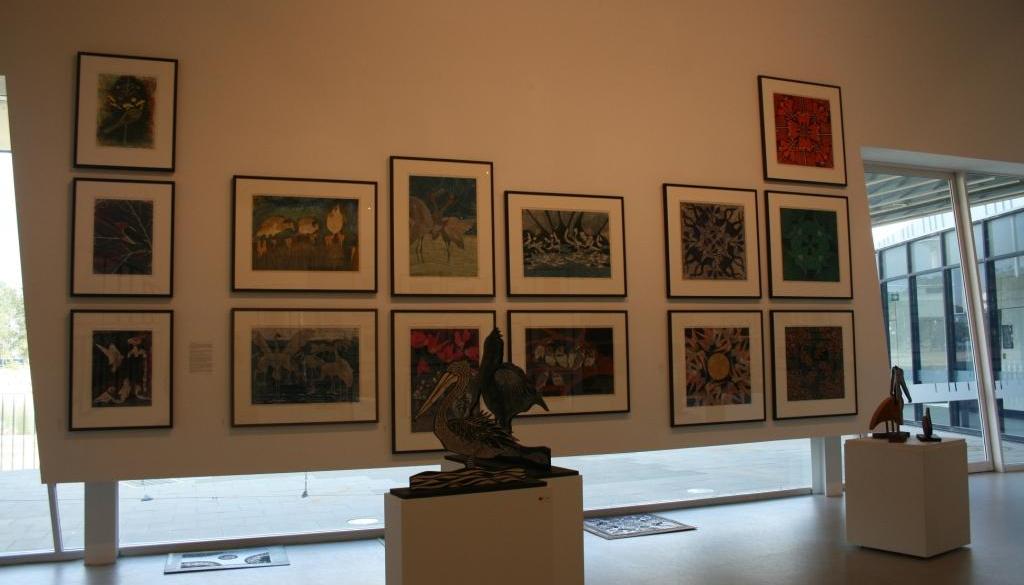
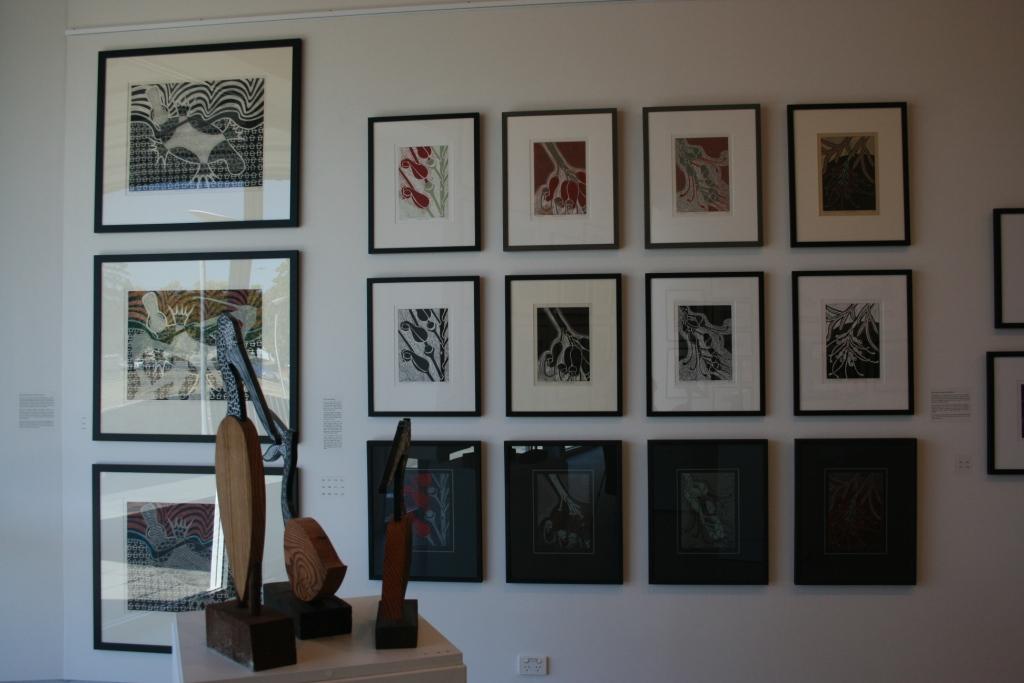
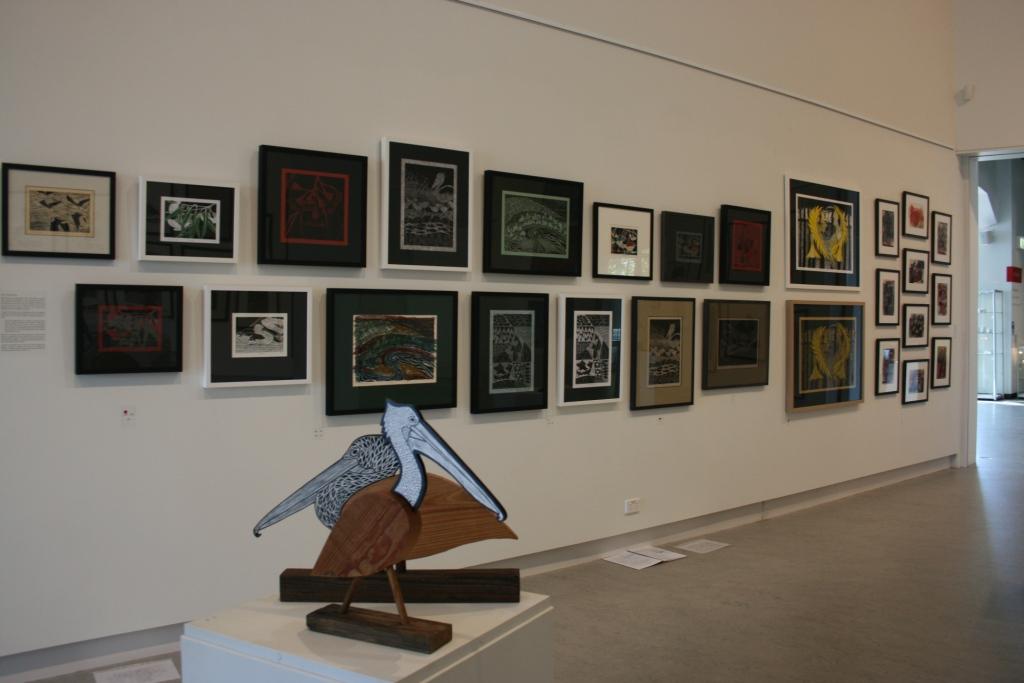
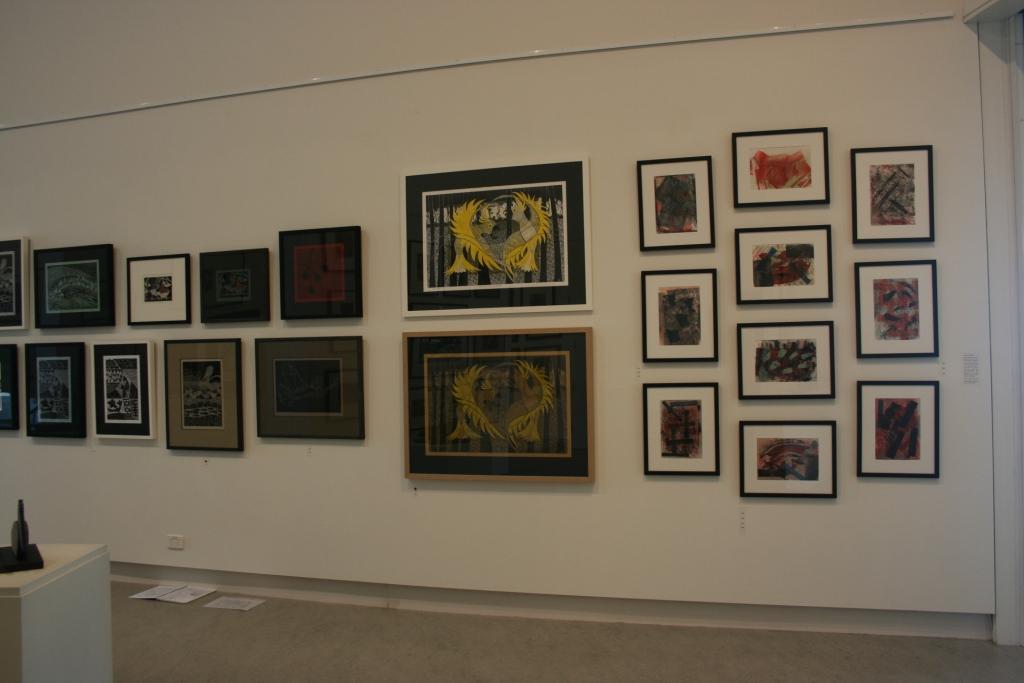
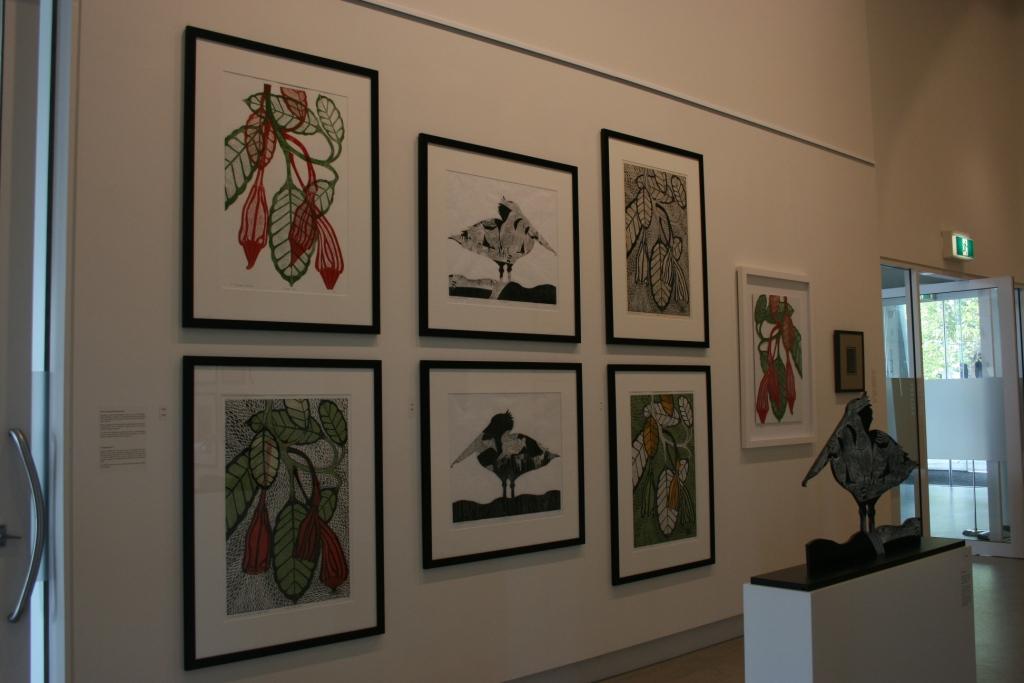
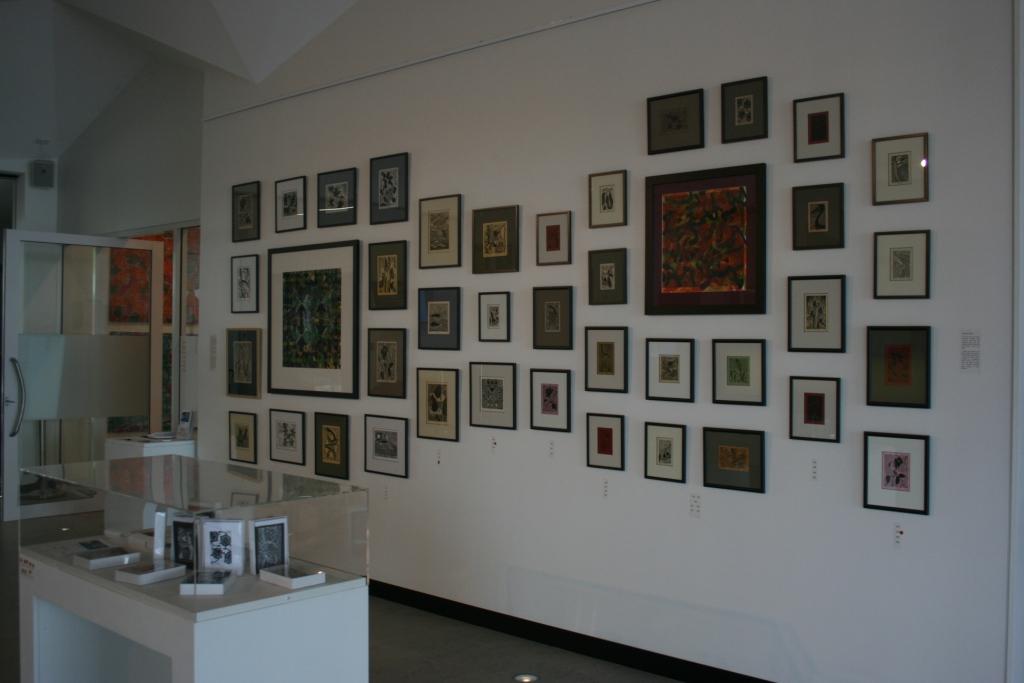
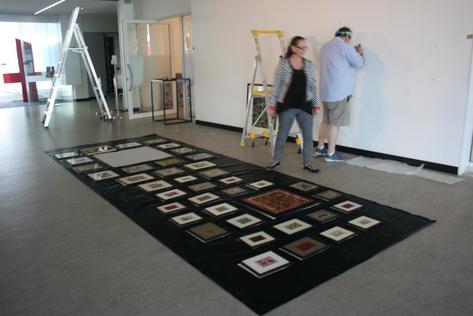
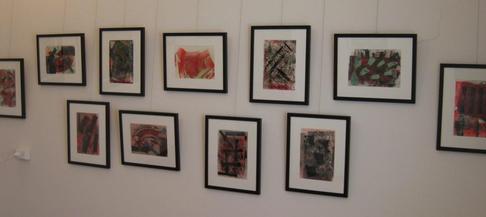
Wall by Wall of 'The Carved Line'
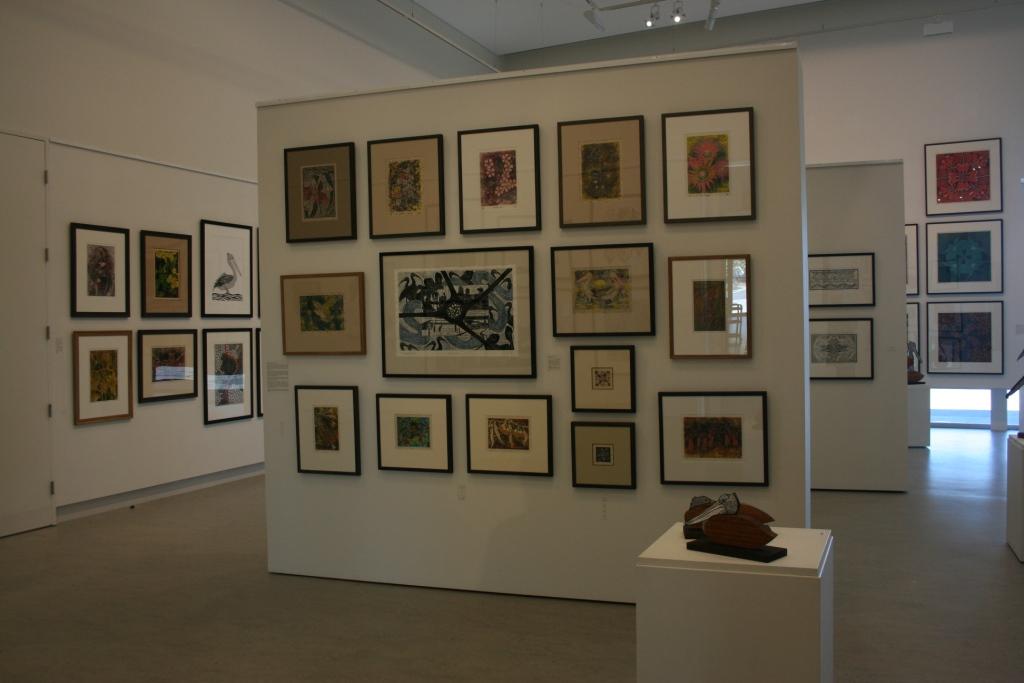
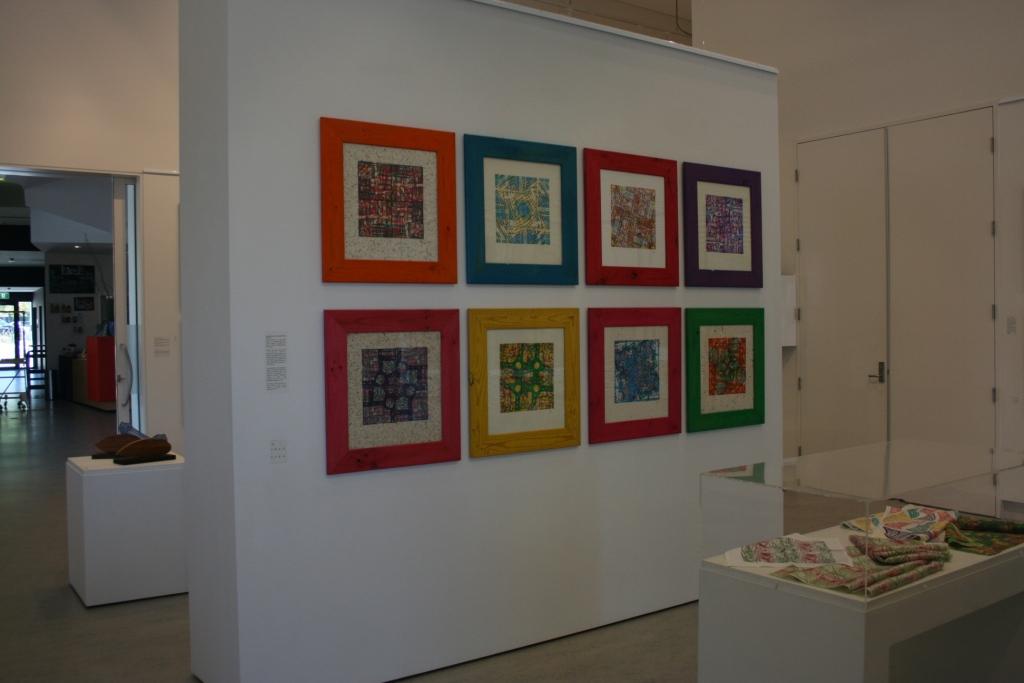

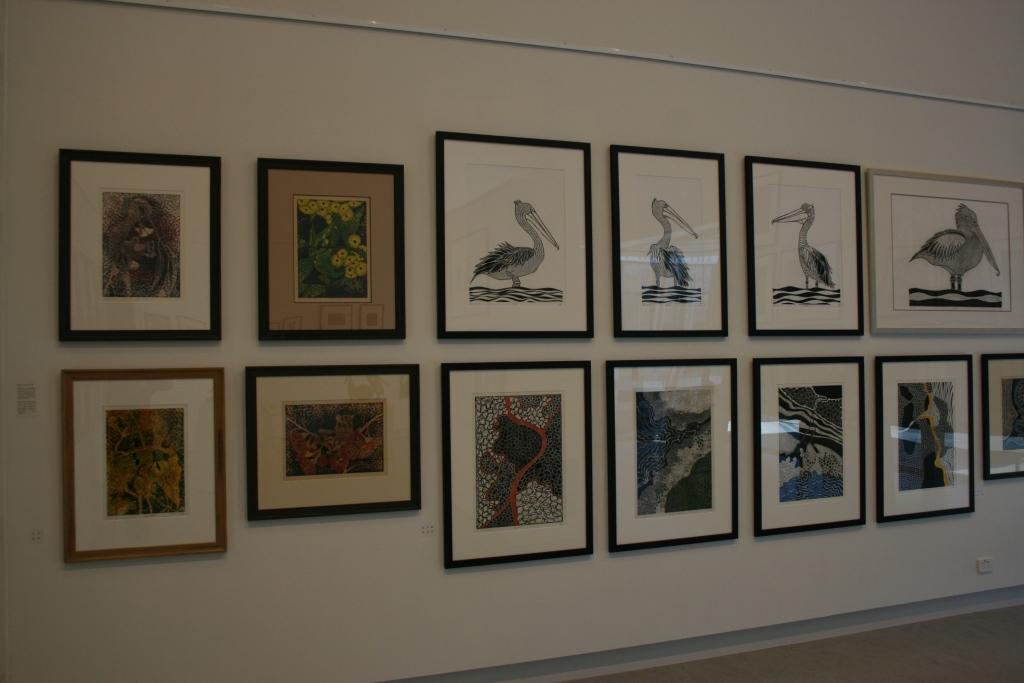
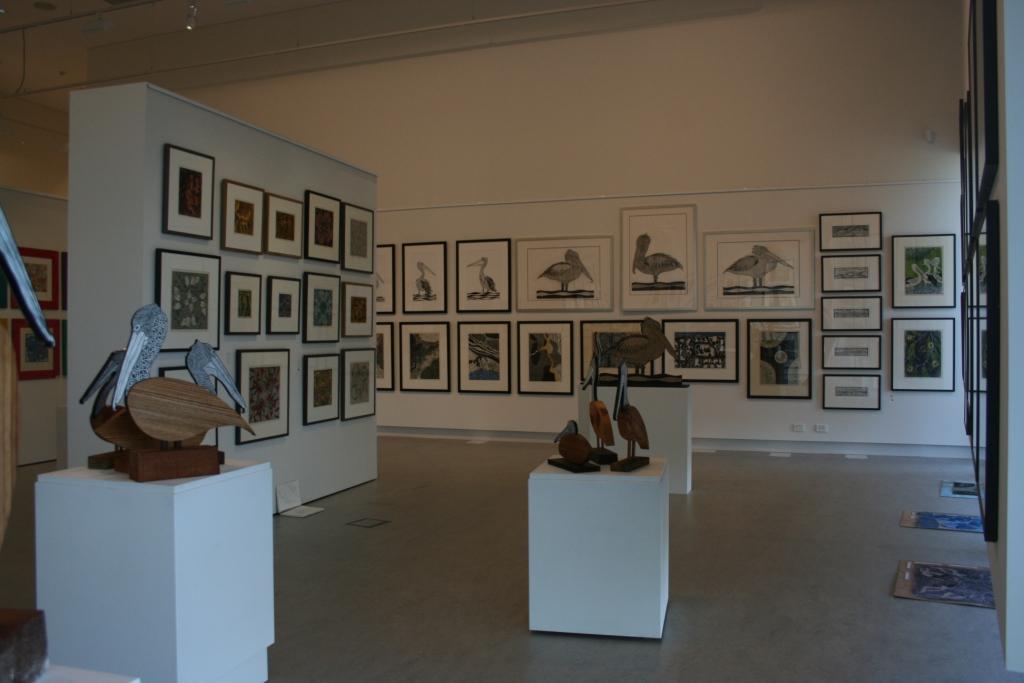

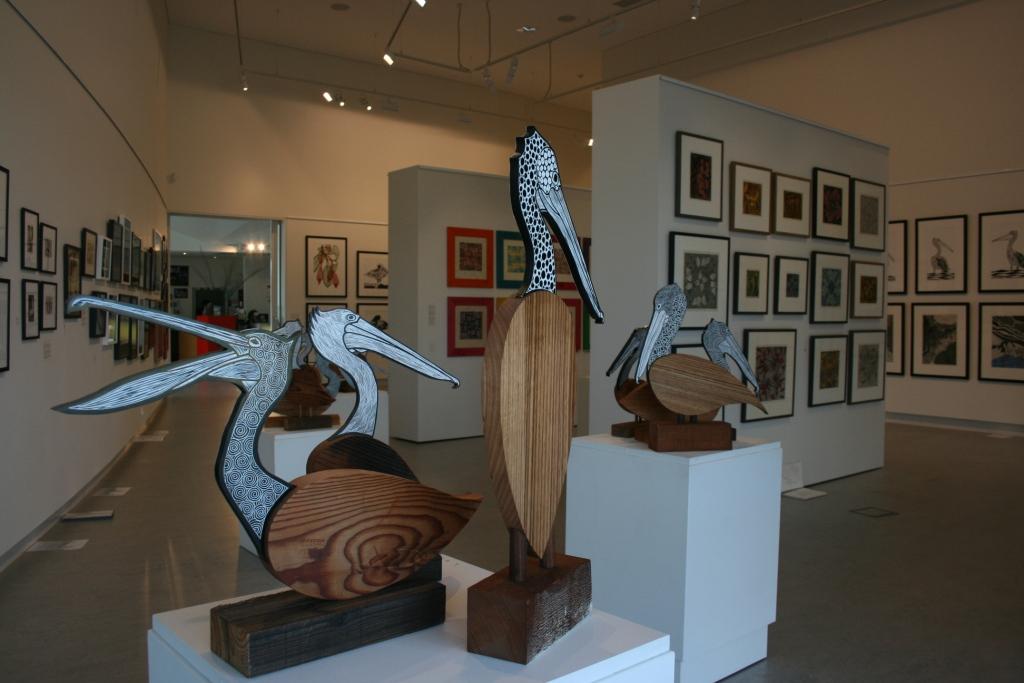

Hanging 'The Carved Line'
My friend Glenda and I collected the 3 tonne hire truck from Wodonga at 8 am on a Saturday two weeks before the bump in day, we drove back to Corowa and packed the wrapped works into wooden crates made by the local hardware store, with the help of our friend Jim. We headed for Canberra at 1pm.
Sunday morning we unpacked the truck and got to attend the artists talks before we headed home.
Bump in started on the Monday and all the art work was moved into the main gallery and the layout of the plinths required was organised
Tuesday things became serious and hanging began. Thanks to Steph, Chris, Glenda and Ann.
|
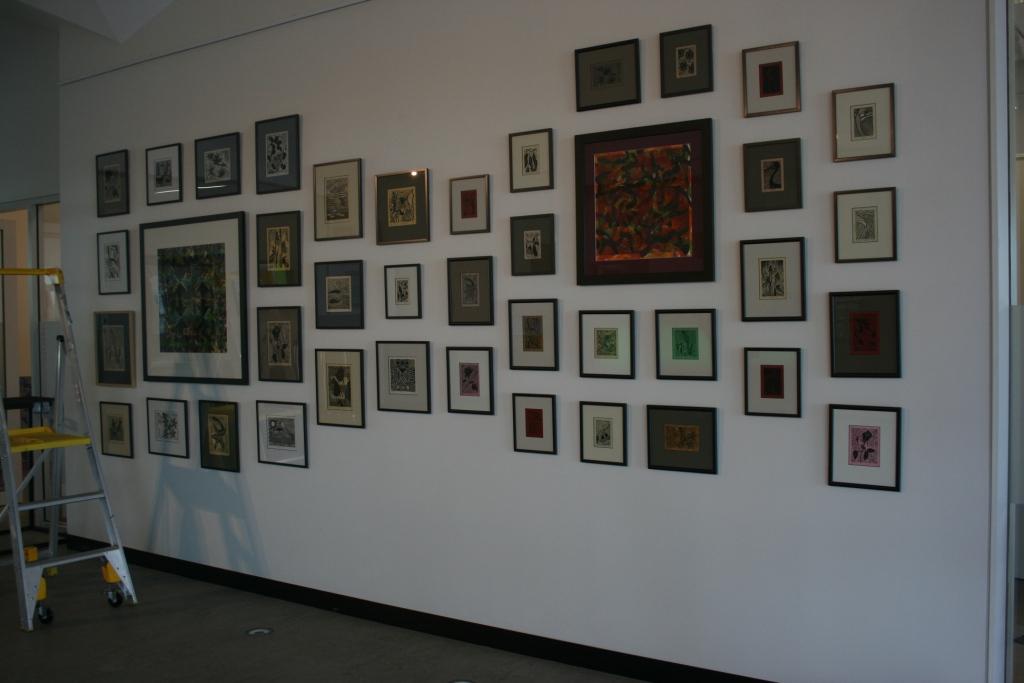
Each wall had been arranged in a methodical way. Thanks to a suggestion from Ann McMahon.
Prints from each series were selected so that their colours and papers went together visually. Frames were selected to add to this visually harmony. Photos were then arranged in Word to complete the visual pattern. A paper template of every piece was cut out and the positions of the D-rings and the exact position of the centre of the hanging wire were marked on the paper template. Black plastic was cut to length of the walls, a centre line was marked and then the paper templates were arranged to create a visually pleasing 'hanging'. At the gallery these Black Plastic Templates were taped on the walls so that the centre line was at the desired height and level. The hanging hooks were then hammered into the wall. The hooks were removed, then the plastic was removed. The hooks were put back up and the artwork hung. |
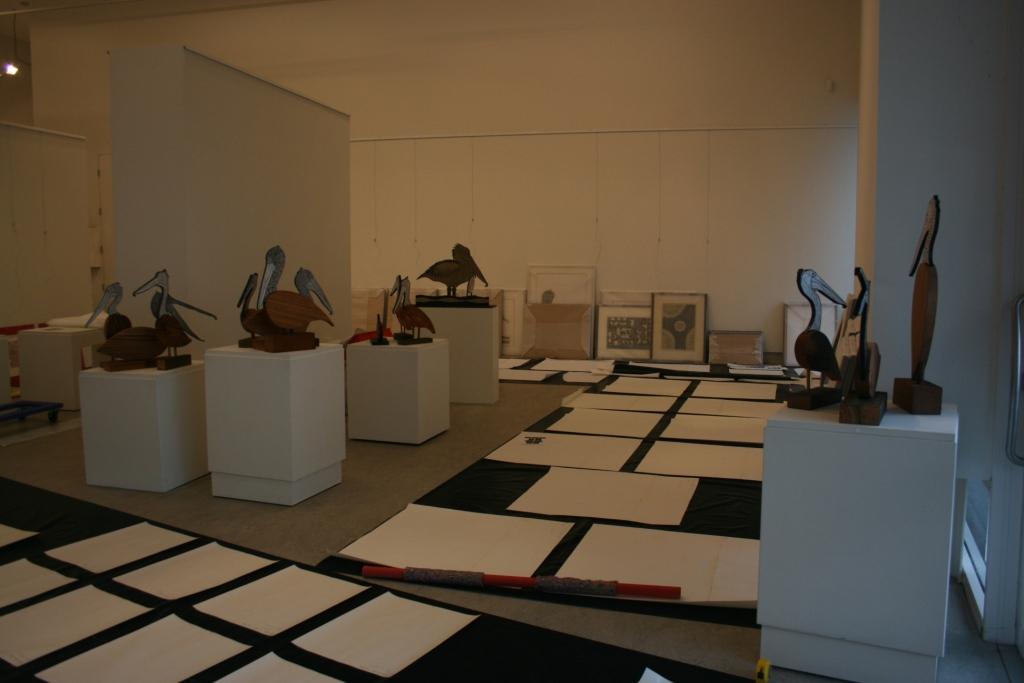
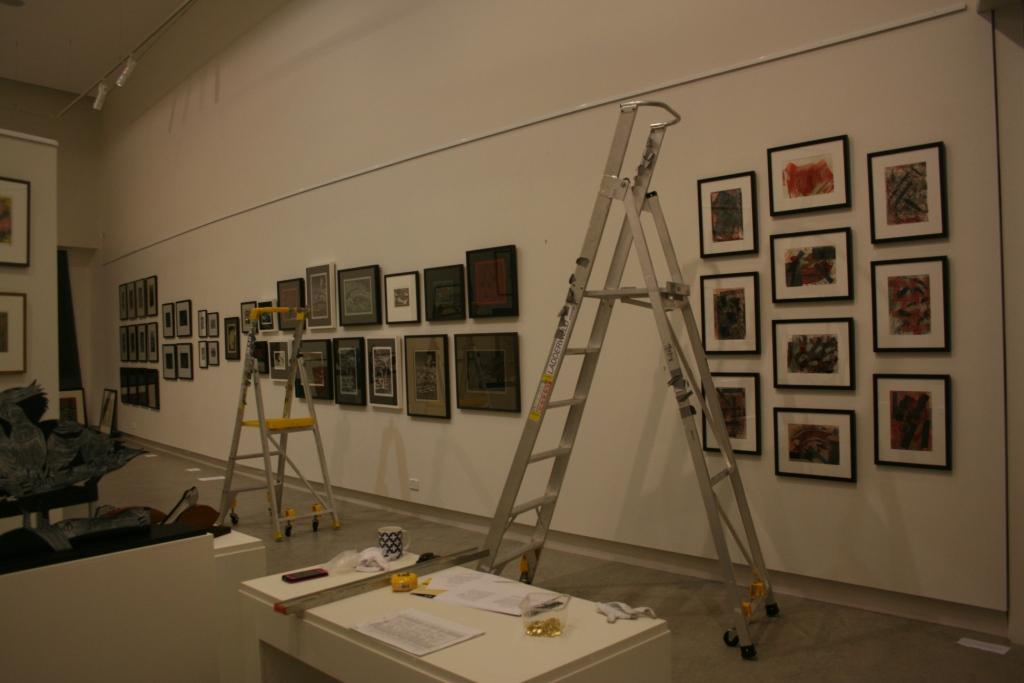
The rest of the gallery being hung:
|
|


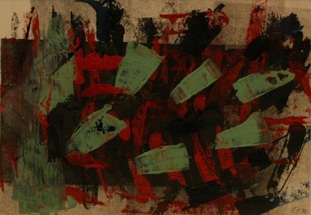
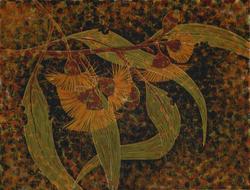
2014: Looking Back to Move Forward
This year's prints have developed from several sources of influence.
During a trip to the National Art Gallery in Canberra I spotted an ARP assemblage tucked away, high on one of the walls. It brought back memories of his worked that I have loved since discovering him in high school. On returning home I dragged out my book on ARP and went down a marvelous feast of memories and ideas.
I had been revisiting a design from my batik days and exploring the use of collage and hand colouring to produce different print series from the one block. But now I had the major work of the series spinning in my head. My painting on glass of the Daysdale Gum helped with solving the ideas into a workable piece.
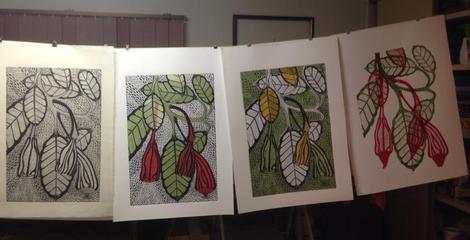
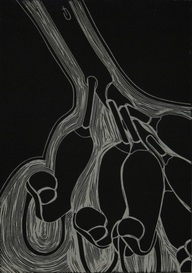
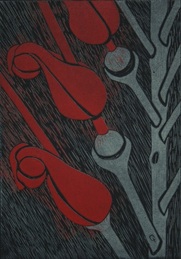
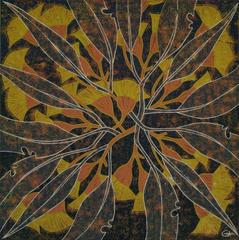
These are the 4 different series of prints that evolved out of playing with the Daysdale Gum idea
Left: is the single cut block print
Left 2: is the collaged coloured areas with single cut block over top
Left 3: collaged background with hand coloured nut and leaves and single cut block over top
Right: is printed using individual blocks for each colour
theses individual blocks have then been used to create my assemblage
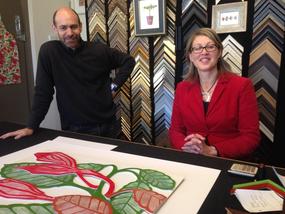
These are my wonderful framers, advisors and friends that have shared this incredible journey of revisiting my 20+ years as a lino block printer
In front of them is the assemblage piece known as : 'Arp, Dayesdale Gum & Me'. Ready for framing.
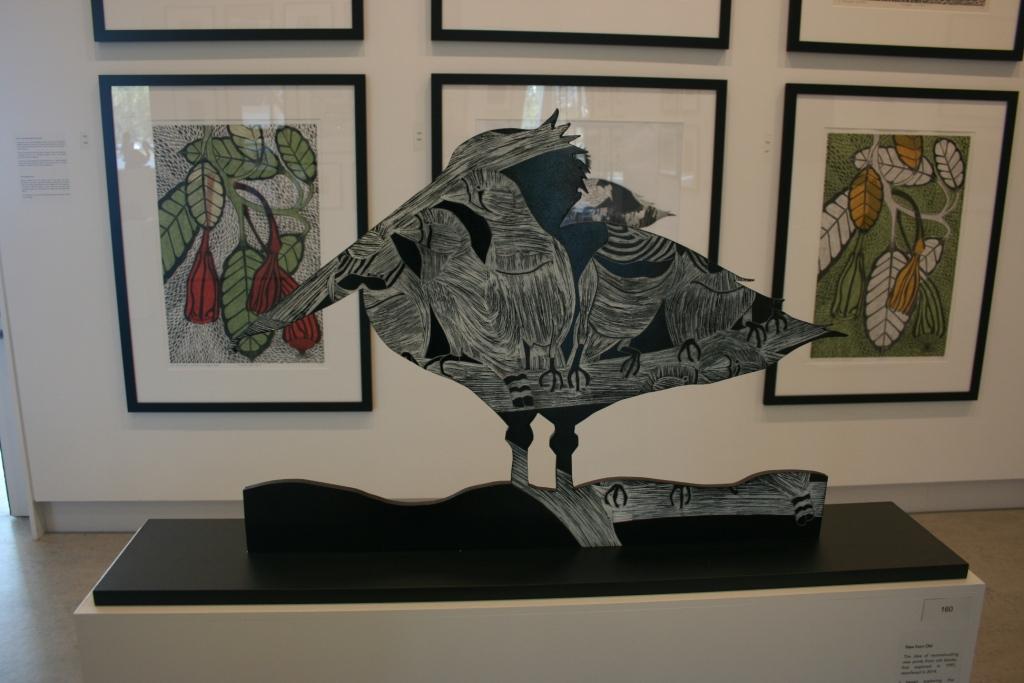
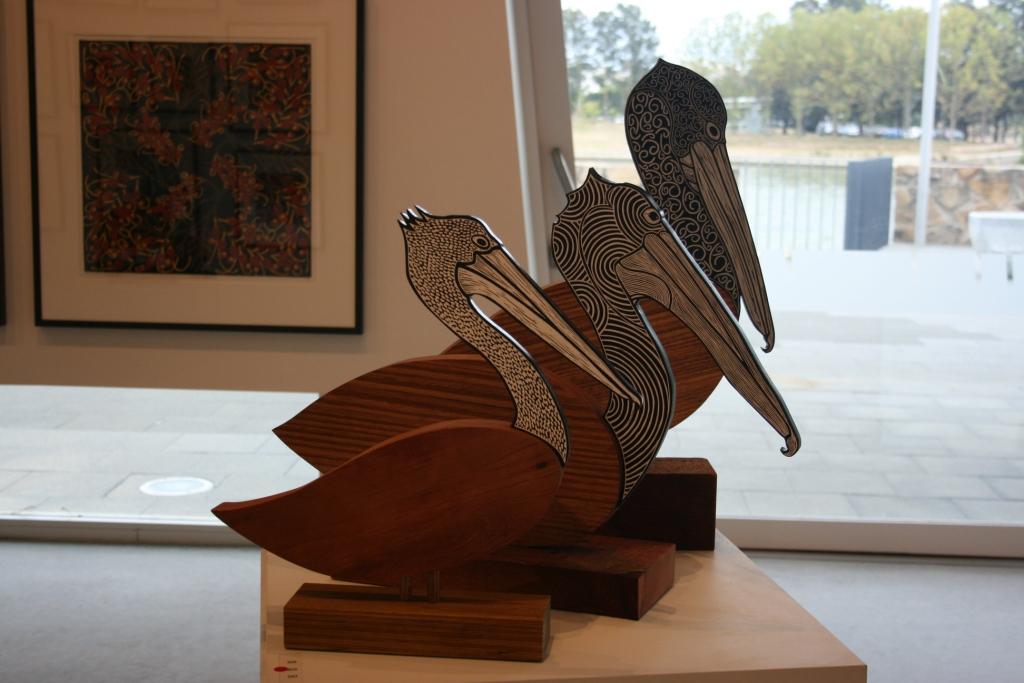
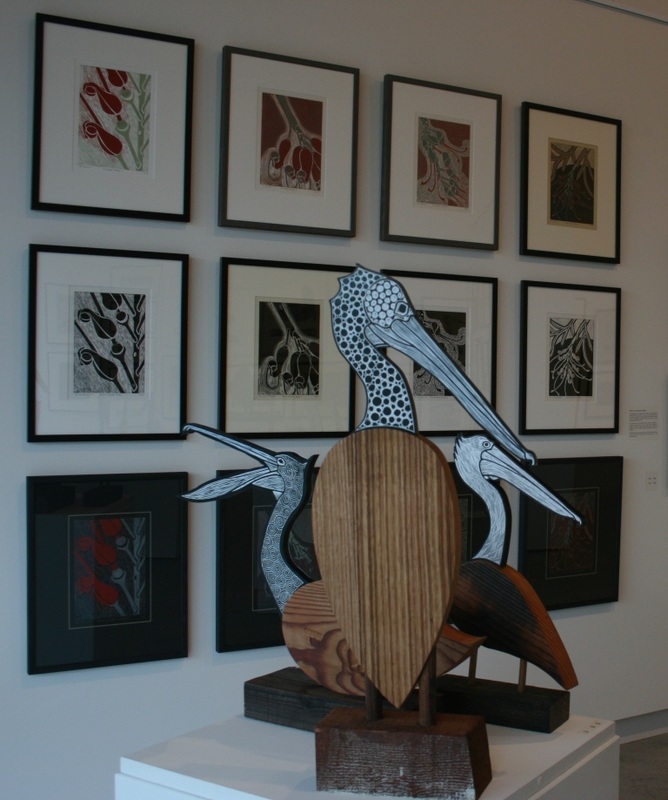
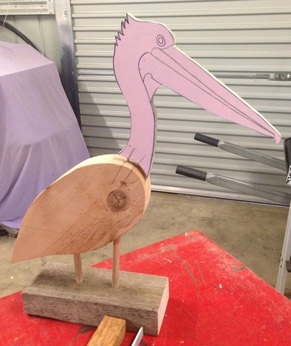
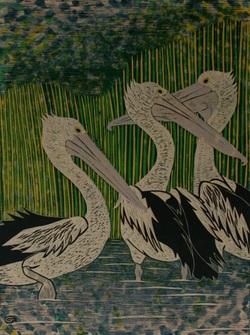
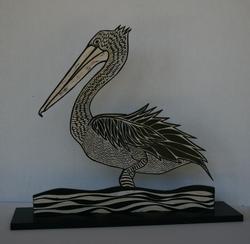
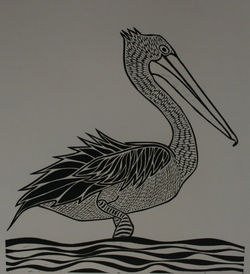
I love Pelicans and have masses of photos of them in all sorts of poses. I also have a love of creating sculptural pieces. Combine these with a shed full of timbers from significant stages of my life with my late husband and inspired by Rosalie Gascoigne's determination to use up what she had collected by creating artworks: and my new pelican sculptures have evolved.
The heads are created from lino blocks on one side and prints on the other; the bodies and bases are created from pieces of timber that have personal significance.
I am having a wonderful time, like a pig in mud, creating sculptures and reducing the timber pile.
The heads are created from lino blocks on one side and prints on the other; the bodies and bases are created from pieces of timber that have personal significance.
I am having a wonderful time, like a pig in mud, creating sculptures and reducing the timber pile.
|
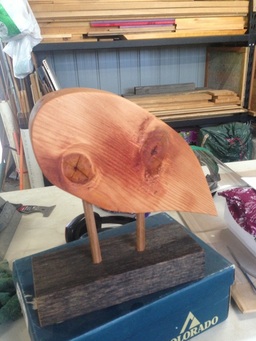
Left: Pelican under construction The pink is the vinyl glued to MDF and cut to shape on my scroll saw. joined to the body with dowel bits (yet to be pushed fully in) Vinyl will be cut and printed (soon) The body is from the beams in our house and cut using may bandsaw Legs are scraps of dowell Base is timber used for box work around cement paths Right: the effects of mineral oil on the timbers |
|
Working in the shed has allowed me to remember the times associated with the timbers I have been using. Some are from the first bed we made so that my parents had somewhere to sleep when they came to visit during my honours year. We had been married 12 months and our son was a a few months old. we had a bed, a cot and a fridge. We bought aluminum chairs and built a double bunk for the parents visit.
Others are from more recent furniture, verandahs, house and paving timbers.
I have left them as close to their original state as possible and use mineral oil to treat them so they show their true colours. 14/11/14
2012: A Touch of Colour
In 2012 I had an exhibition in Gallery 294 Corowa, called A Touch of Colour.
Creating artworks for this exhibition was all about allowing myself to deal with the emotions of losing my soul mate (in 2011) and to start the slow process of focusing on my new journey in life.
Like all my exhibitions and most TV shows this exhibition had 3 story lines: Looking Back, Moving Forward and Moments of Madness
Moments of Madness
At the end of an printing I clean up left over
inks and inked blocks by transferring them onto many sheets of paper that end up
scattered all over the studio floor and flat areas.
The very same pieces of paper are used after each printing….UNTIL they yell at me to stop adding more and leave them be…hence the name Moments of Madness.
It takes a multitude of prints over a period of a couple of years to develop these works to the point of being artworks or moments of madness. And 11 yelled at me during 2012's printing. 10 will be in this exhibition. I hope you enjoy them as much as I did creating and finding them. 25/10/14
|
|
Looking Back
To kick start the creative juices I rummaged through the studio and unearthed unfinished blocks and designs for lino cuts that had never been resolved. Some were transformed to allow them to take on new and relevant meanings.
|
two examples from this series were
'Reflecting' (on the left) A comment on how when I did reflect I did it with the presence of others nearby: sometimes with family members; sometimes with friends and colleagues; sometimes physical and sometimes imagined 'River Bend 1' The coloured Mono print behind River Bend 1 was created in 2008. The River Bend design was resolved into a Black and White Lino cut in 2012 and reflects the ever changing journey that is life |
|
Moving Forward
With all the unresolved works resolved it was time to create completely new work.

Remembering the good times during the start of 2012 created the designs for While Seagulls Sleep (on the right) and Watching (on the left) Both comments on the activities that occur during the evening and during the day when camping with 4 families and their dogs at Easter. |
|
Walking by dog Bonnie through the wooded areas on the banks of the Murray created new designs for Flustered (on left) and Extreme Sports Sulphur Crested Style (on right) Flustered is about the noise of the Sulphur Crested in flight. Extreme Sports SC style is about the noise, the movement, the speed and the dangers of the play they get up to when swooping after each other between the trees near the river. 23/10/2014 |
|
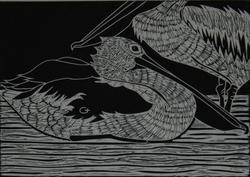
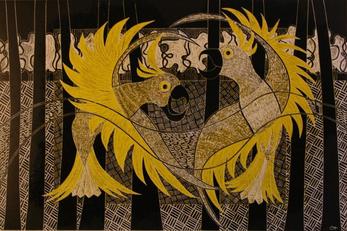
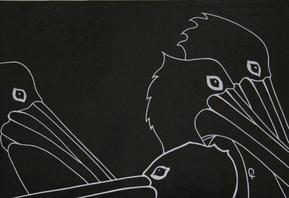
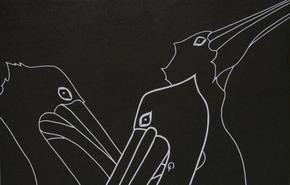
2008: Pelicans, Adolescence and Matisse
After a family visit to the National Art Gallery in Canberra, a challenge was thrown down by my daughter.
We had both admired the work of Matisse, in particular his use of a simple line to create his stunning lino block prints.
The challenge was for me to create works using a similar line work instead of the very intricate patterns created lately.
I was reminded that I also encouraged my students to push themselves from one extreme to another so that they develop a greater awareness.
In my case my comfort zone included intricate patterns, especially in negative spaces...and now I had to leave the negative spaces untouched.
Of course my visual was pelicans; my theme was the portrayal of adolescent 'love' (a topic I saw everyday in my job) and emulating my hero Matisse.
The designing was the easy part: the restraint needed when carving was a real test of restraint.
|
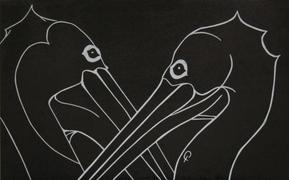
These are the results
Top left: 'Dreaming' Top right: 'Still Dreaming' Bottom left: 'Courtship' Bottom right: 'Smitten' 23/10/2014 printed with mechanical press |
|

2007: Grevillea Studies
Grevillea Studies was a series of prints created using the new printing press and playing with the images created from drawing studies done of the flowers of one grevillea whilst on holidays at Byron Bay.
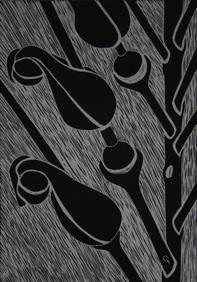
These are the Black and White versions of Grevillea Studies 1& 2 at the top and Grevillea Studies 3 & 4 at the bottom Striking prints with contrast between the patterns in the background and the solid areas of ink Printed using my new mechanical press This series was printed before the elimination prints, shown below, were created. 
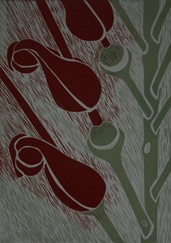
The image on the left is of Grevillea Study 1 printed from an elimination block and created as an edition of white or coloured papers The image on the right is of Grevillea Study 1 from the series of elimination block prints that were created solely on Black paper. Both series were printed after the series of Black and White Prints above. Making it impossible to take more Black and White prints. 13/10/14 |

|
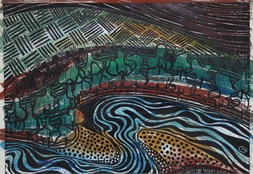
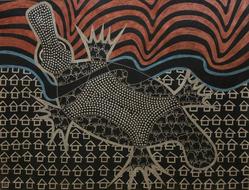
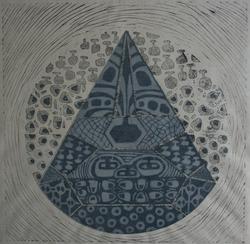
2001: Red Soil, Water and the Presence of others.
During this time in my life my focus moved away from doing to teaching.
But in 2001 I did dabble with the depiction of the Murray around the Swan Hill area and created a series of Artist Proofs and Working Proofs trying to come up with best representation of the area.
But in 2001 I did dabble with the depiction of the Murray around the Swan Hill area and created a series of Artist Proofs and Working Proofs trying to come up with best representation of the area.
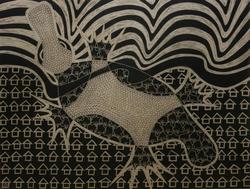
In this version a straight black and white image was created representing the red soils, the Murray River, the fruit industry and the human occupancy of the areas along the river at Swan Hill
The platypus is a significant other in this landscape and is an indicator of the health of the waterways
The dots on the platypus were created by 'soldering' holes into the surface of the vinyl, which leaves a raised rim of molten vinyl around the hole. It is this raised area that captures the ink and thus prints a crater like image on the paper.
There will be no more of these printed
From memory this was printed with the new press that was purchased after winning a major award for artwork in the same year...I must check and confirm this
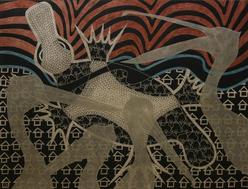
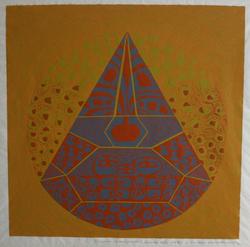
In this version the pattern on the platypus is still created by the raised ridge left from the 'soldered' holes in the vinyl
The red soils are hand coloured and so to is the waters edge
The ghost like images of the pelicans has been lino block printed onto translucent Chinese printing paper, cut out and adhered to the surface.
Pelicans being another 'significant other' in this area
The red soils are hand coloured and so to is the waters edge
The ghost like images of the pelicans has been lino block printed onto translucent Chinese printing paper, cut out and adhered to the surface.
Pelicans being another 'significant other' in this area
This version may appear the same as that above, minus the pelicans, but there is one other difference.
The ridges created by soldering the holes have been sanded off and the resulting printed pattern on the platypus is that of neat circles of white paper.
Consequently an edition of the above versions are simply impossible.
Any editions created will be from this block, making the proofs in the two versions above are extremely rare.
13/10/14
1998
1998's lino block prints were inspired by a road trip to Adelaide and back via different routes, with camera and sketchbook in hand.
Three series came out of the journey: small prints of blossoms; rotational designs and social comments. The results of birds, blossoms and people watching
Three series came out of the journey: small prints of blossoms; rotational designs and social comments. The results of birds, blossoms and people watching
Small prints: Blossoms
yes still printing with the old hockey shoes
On the left is Dudley Ave Gum after the street in which I found the blossom On the right is Cassia Fistula a small deciduous tree also known as Golden Rain Tree |

|
Rotational Designs
Traveling gave lots of time for playing with ideas
With my involvement in teaching fabric printing and playing with repeats and linkages I had been using single blocks to explain the different flips and rotations that could be created when designing for fabrics. Now I started applying these ideas to create blocks combining different rotations into a single block to be printed on paper On the left is As Light as Air. The seed pods of the Cassia Fistula, when dry, are paper thin and float to the ground on gentle breezes. Large Rotational Designs
|
Above is Glimpses of Mustard Blossom
|
Left is The Caretakers based on the Cooktown Orchid but looking more like the ancients watching over us Right is Roll Call, Roll Call inspired by the start to the day at school, with teachers calling their charges to order both large rotational designs both foot printed Social Comments
After Roll Call Roll Call my focus turned to recording some of the everyday occurrences in our small community
I have always found it easier to get birds and plants to say what I want to: that way I don't upset the community too much. Above is Hmm I See What You Mean! To the right is Takes Two to Tango. Both are foot printed. In both I have started playing with painting on the printing ink to create different atmospheres. The use of a very small roller has also been introduced to give more options when inking up the blocks 29/9/2014 |
|
1996
1996 saw more foot printing with hockey shoes and the playing with pulling different amounts of each colour through
1996 also saw the development of the first series of pelicans as 2D and 3D prints
It all started with the design called Where's Harry?
1996 also saw the development of the first series of pelicans as 2D and 3D prints
It all started with the design called Where's Harry?
This is Where's Harry, 3 pelicans looking around for Harry
a situation that occurs in every stage of life
parents looking for kids
teenagers looking for their mates
families looking for grandmas
These characters came to life as Fred, George and Mabel
3 likely Aussie characters
They were turned into 2D portraits and 3D sculptures
with block on one side and the print on the other
The blocks of the characters were created by gluing the lino to MDF and cutting the shape of the pelican out using a jig saw
This 'block' was then foot printed to produce an edition of prints
One of these was glued to the other side of the carved block and then a base was created to support the 3D form
The image to the left is the 3D Fred
This is Fred the print
Because the print from a block appears as the mirror image it was easy to trim and glue a print to the other side of the lino block
Only 3D Fred will be at the Canberra Exhibition
But the prints of Mabel and George and Fred will be there
And Yes there is a Harry
He and Gwlayds and Bessie will also be there as prints
with 3D Bessie representing the larger pelicans (the ancestors)
16/9/14
1995
1995 saw the development of 3 distinct series, experimentation with foot printing and the use of a soldering iron to create the 'carved' line
Blossoms Plus Series
These were all elimination block prints. The blocks were different floor vinyls and wall vinyls and the technique used to lift the print was foot printing
Blossoms Plus Series
These were all elimination block prints. The blocks were different floor vinyls and wall vinyls and the technique used to lift the print was foot printing
Foot printing was an extension of finger printing
The block is attached to a piece of stable timber with enough surround to allow for registration tabs to be attached
The paper, to be printed on, is carefully aligned to the tabs and lowered onto the inked block
If this paper is thin another protective sheet is carefully placed on top
I then step carefully onto the paper and walk on it using very small repetitive steps working from left to right and top to bottom across the area being printed
Care must be taken at the edges not to move the paper or to damage it
I step off the block repeat the process starting on a different edge or as required
In this example the dapple effect is created by the roughness of the water colour paper that the image is printed on and the fact that I walked on the paper being printed with my old hockey shoes that have dimpled soles
The print above was also foot printed with hockey shoes
Every print, in the edition, is totally different to each other because I can control the amount of colour that is lifted each time a colour is added.
I can choose to produce solid colour or dappled colour
I can walk on all areas or just make individual steps
Foot printing gives a variation in atmosphere that is not found as easily in press printing
30/8/14
early 1990's
experimentation with papers was a keen focus in the 1990's
I tried many different types and played with the effects they had on the inks
This paper had lots of ridges and created wave like effects especially with finger and hand printing
At the time that I started lino block prints in the early 1990's water-based printing inks were being introduced
These inks presented problems when used for elimination block printing, they de-laminated after the over printing of a couple of colours. The layers came off in bits and stuck to the block giving a mottled effect (see below)
The effects were fabulous from an artistic point of view
All of the blocks were printed with hand and finger pressure as the papers were thin and the paint was unstable
Using finger pressure meant that different amounts of the colours could be transferred, according to the artist's whim.
You can see the 'finger prints' in the background
But even still the results were unpredictable...surprises like Christmas morning as a child
At this time I was in contact with the techs at the company that was producing the ink and changes were made to the mix.
Now the de-lamination doesn't occur
You can see here that although the yellow and the red was printed before the greys
some of the grey ink has lifted to reveal patches of yellow and red in areas that
should have been solid grey (the gumnut base right hand side)
A great effect that can no longer be obtained with modern inks...that I have found yet
25/8/2014
1971
This print is part of the very first lino block print I had ever done
Not completely sure if I did one at school but if I did it certainly did not grab me
I was in third year at the Newcastle branch of the National Art School and it was 1971
We used the old 'Battle Ship' Lino that was made from compressed cork and linseed oil
It smelt great when it warmed up and carved well, when new and warm
It was my first introduction to rice papers too
Although it was an enjoyable experience I was far more interested in a career as a sculptor and teacher than a printmaker
Even at this stage I was more interested in creating different prints from the same block rather than making them all the same: but marks were awarded for sameness
Both prints were hand burnished with a wooden spoon, as there were no presses at the Newcastle branch of the National Art School
As most of us had come from country areas the lack of equipment was normal to us and we never saw it as a limitation on creativity
The technique used to create the print was the Elimination technique also known as the Reduction technique
This means that only one block is used to print from
After a colour is printed the areas that need to stay the colour just printed have to be eliminated (carved out)
In this print a solid colour was printed (ochre) first,
the only original area of the lino block that is left at the end is what is needed to print the very last colour: in this print it is the blue
22/8/14

I am developing a line of sculptured pelicans that will have heads that are created with the carved block on one side and the print on the other
Further explanation of the process coming
Most days at the moment are spent stocktaking past prints and recording paper types, printing techniques
Yes finding them is part of the problem as they are stored in a variety of places around my studio
